Red Accents – What I Wore
Yesterday I decided to wear this lovely grey, woollen dress from Zara. It’s very plain, but very versatile which I LOVE.

I felt like making my outfit a bit more festive by adding these cute winter tights i probably bought from Primark (lets face it, most of my clothes come from there). I just love the adorable snowflake and heart pattern! I find these adorable ‘pixie’ boots from new look go perfectly with most outfits, I haven’t wore them in a while and so I had to show them a little bit of love 😉

I also added this sparkly belt to add a bit of festive glitz to the outfit. I’m pretty sure that this is, again, from Primark.

To finish it off I continued with the festive theme by adding a festive colour! I went with my bright red Zatchel and red beaded bracelet. I just love this bag, it’s so well made and big enough to carry everything I need.

Over the top I wore the cape that I made myself which again adds a bit of wintery sparkles. I’ve actually been thinking about ways I can improve this cape design and hope to be making many more in the near future! Although I know there are a lot of improvements to be made with this cape I still love it dearly and love to show it off at any possible moment.


For my make up I went for some subtle, but striking, eyes. I used white and silver/grey eye shadow before lining with black eyeliner and then a sparkly eyeliner on top (again adding to the glitz!)
I decided i wanted bold lips and what better than bright red to match my bag! I very rarely wear lipstick but definitely think I should do it more often.
I just left my hair in it’s natural, wavy state (i’m far to lazy to actually do any serious styling) and just pinned back the front to keep it out of my eyes. Despite being so simple my boyfriend kept saying it looked really nice! Sometimes I guess simple is the way forward. 🙂


Do you like to wear bold colours?
Smokey Eye Tutorial
Welcome to my first instalment of Friday Fabrications!
This is where you will find tutorials for anything I can think of doing!
I’m going to start with a make up tutorial, the smokey eye look. I will warn you, this will be very picture (and word) heavy.

This is a look that I have honestly never been able to create successfully until about a year ago. No matter how hard I tried and how many tutorials I looked at, I just seemed to mess it up completely when doing it myself. So this tutorial is hopefully going to help anyone else who’s had trouble with the smokey eye look and give you a few hints and tips to make it easy to do in a relatively short time!
Of course the first thing you need to do is clean your face of any old make up and give it a good wash. If you have primer (which I dont *slaps hands*) then you should also apply that as it helps to give a more even skin colour and keeps the make up on longer.

Then you should apply the bottom layer of make up, I like to call it the skin layer as it is there to make your skin look nicer. You should first use some cover up over any spots of blemishes and blend it in followed by some nice foundation. I use Match Perfection and Clear Complexion by Rimmel as they’re fairly cheap but still work brilliantly. I also always choose the lightest colours as i’m quite pale and I find any darker really makes my face stand out. In my opinion you should always go at least one shade lighter than your skin colour to avoid orange skin, because lets face it, orange is really not a good look, even if you are from Essex.
Now that you’ve made your face look like it is free from any sort of blemish you should apply the blusher. I just have some cheap tesco blusher and personally I dont think you need to splash out on blusher at all. With things like mascara and foundation I would always recommend a good brand, but blusher is a lot more forgiving and so if, like me, you need to save money you should save your pennies on the blusher. You do, however, need to buy a good brush. Ok so this brush was also cheap (compared to leading brands at least), but it is big and fluffy and perfect for the job!

There are two ways I usually do my blusher. The first is using the whole brush and using it on the cheek in a circular motion, creating a nice rosy look I usually use day to day. The other is to squeeze the brush and sweep from the cheek towards the top of the ear. This I feel is better for a more sophisticated look and I use it for the evenings. I used this sophisticated look in this tutorial as I was actually getting ready to go out with my work friends.

Next is the eye shadow. Again I don’t think it’s massively important to have an expensive eye shadow, although I do prefer them as they’re usually easier to blend. If you can afford it easily I’d recommend the extra money, but if not then it wont make a massive difference. I’m again using the tesco barbara day make-up (the silver pot) and also a colour palette from marks and spencers. I love colour palettes, especially the ones with just 3 or 4 complimenting colours. They are just so useful and usually contain colours that will blend together really well.

First you just need to put a layer of the lightest colour you want to wear. I tend to use my fingers when applying, but that’s just my personal preference as i just never seem to get on with the brushes. I decided to use a white colour this time. You can put as much of this on as you want, some people like it all the way up to the eye brows but I personally find this a bit…hooker-esq. I prefer to do mine about half way, so that the make up just comes up on to the bone. I also like to put a spot of the lighter colour right on the inside corner of my eye as it brightens and lifts making you look more awake.
Then you need to take the middle colour (I used the silver pot here) and start at 3/4 of the way in, sweeping to the outside of the eye. Now you just need to blend them together so that there are no definite lines where your make-up changes colour. Most of the time when blending I end up adding more eyeshadow on as well just to make sure it is thick enough (as it was not in this photo)

Before blending
Next is the darkest colour. I use the tiniest spot and dab it right on the outside of my eye before smudging it a little inwards. I find this works perfectly for me, making the black not too heavy and nicely blended. For some reason I find this one never needs as much blending as the other two personally.

eye shadow finished
Next is the eyeliner. I prefer liquid to pencil but do switch between both. I usually use collection 2000 as it’s cheap, however although their normal liquid eye liner goes on really smoothly, I find it often smudges off on the corners during the night so in this tutorial I used their waterproof version which has a bit more sticking power. However I wouldn’t really recommend this one either as it is not so easy to put on, no where near as smooth to apply as the normal, bog standard eye liner they have and made my lines a little messy in this tutorial. Next time I think I might splash out on a better brand.

To apply eye liner I steady my hand by resting it on my face and either leaning on a windowsill, or holding my elbow with my other hand. Keep your eyes open (yes both of them!) as you need to see where you’re going. I then start from the inside eye, usually just about where you started the middle eye shadow, and slowly (with little strokes) move towards the outer eye.

When I get to the corner I usually do a little flick. This flick definitely doesn’t need to be big at all and just follows the corner of your eye up. If you can’t see the direction your flick needs to go then I would aim to meet the outer tip of your eyebrow, but just don’t draw all the way there. You should know if you’ve done it right by closing your eye, if the flick is in a more or less straight line from the rest of the eyeliner then it is correct.

You can tell it is a little messy, this shouldn’t happen with a smoother eyeliner.
Next is the eye lashes! Again I’m using Rimmel, they are definitely one of my favourite brands as they’re cheap but have good quality products. I actually have three mascara’s but tend to only use these two. The one on the left is lash excellerator or something, i’ve used it so much all the writings come off the packaging! I tend to use this day to day for the long lash effect and love it! The other is Scandaleyes which I honestly only bought because it was on special offer and cheaper than all the other mascaras at the time. However I absolutely love this one too, the brush is a bit big and took a bit of getting used to (i got it all over myself the first time i used it!) but now I love how thick it makes my lashes look! I also have a waterproof mascara (Rimmel : Sexy Curves) for those times where you just know you’re going to be emotional.

I also always always always use an eyelash curler when doing mascara. Without them you can’t really tell how long my eyelashes are, but with them curled it not only creates the illusion of length, but also again helps with your eyes looking bright and open. I find that with my curler I don’t really need to use false eye lashes as I get the same (but more natural looking) effect.

When Applying mascara I tend to sweep the brush side to side rather than from root to tip. I just find it gives a far more even coating and helps against getting it all over your face.
Et Viola! Smokey eye complete! You can add some lipstick now if you like, but I find it’s best to go for the more natural colour as your eyes are already quiet heavy and it would otherwise just look too much. To me it’s the same as the legs/boobs rule. You can’t have both out, just one or the other. Although, like with the legs/boobs rule, I have broken it on occasion.

Of course you can always experiment with other colours too! When we went iceskating the other week I used a dark blue instead of a black in the corners and a black sparkly eyeliner.

I have also done it in various shades of purples and again in browns (which is my favourite as it looks the best with my eye colour)
‘Till next time!
I’ve been a little busy…
Sorry for my terrible blogging, this last week has been a little hectic to say the least.

We all love a little Risk
Last weekend we visited some of Ash’s friends and had a nerdy weekend away in the midlands.
We ate chinese take away and played Lord of the Rings Risk into the early hours of the morning and generally had lots of fun.

Yellows defending their territory.
We have also been rearranging our flat as we’ve just bought a new desk for the grand price of 99p! We decided there wasn’t enough room for the both of us on one desk and that, even though it would be a squeeze, we could just about fit another desk in. Ash found a desk on ebay which is very similar to the desk we already have, just without the bookcase attached to the end. He bid on it and ended up being the only bidder! Lucky us!

So much room!
We picked it up yesterday and tried to figure out how to fit it in. We’ve finally settled on moving our desks in front of the window and next to our bed. This makes that side of the room very cramped, but the side with a tv is now lovely and spacious, perfect for playing my kinect! 😀
We haven’t quite finished setting everything up (we have far too much stuff accumulated for such a small flat! It’s ridiculous), but when we have it’s should be small but far easier for us both to get on with our own things. Finally I’ll have lots of room to sew!

I moustache you a question.
I’ve also been on a few nights out, one with work, another with my sister with lots of movember madness and a quiet drunken pub night with Ash. All we’re very fun and left me feeling a little worse for ware the next day.

Work drinks are always fun.
I do have lots of fun posts planned for future, including a make-up tutorial, some tips for your CV and many more helpful things! I just need to get round to writing them…
Until next time!

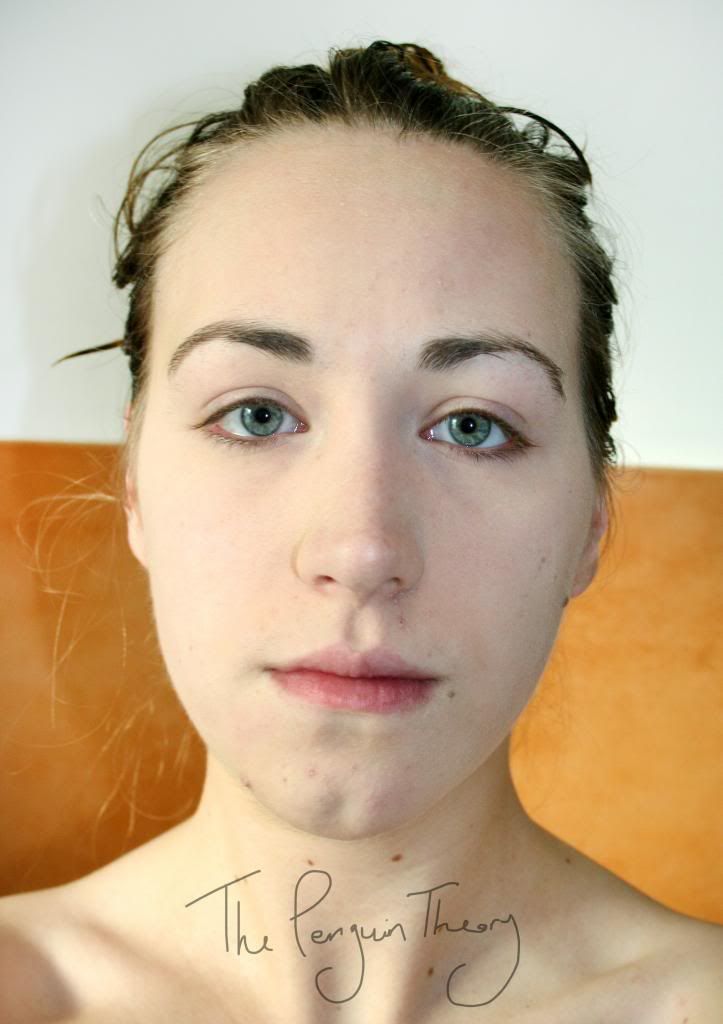
Make-up tutorial teaser!
1920’s Prohibition Era Ball
My boyfriend has finally started University! Unfortunately his loan hasn’t come through yet, but hopefully it wont be long.
His Freshers Ball was in the Theme of the Prohibition Era. Luckily I had the night of work because I was so excited to dress up in tassels and big feathery head pieces!
Unfortunately I ended up working a lot before going (4 people have just left my work including one of the managers meaning we’re pretty low on staff) so I didn’t have time to buy the amazing outfit I had envisioned.
Instead we had a quick run to Camden on the day to of the ball as we figured it would be the best place to find some vintage looking outfits. I did see some lovely and perfect outfits but unfortunately my budget would not allow for them. I also saw some cheaper outfits which again would have been perfect but I just couldn’t justify spending £20 on them when I knew I wouldn’t wear them again.
In the end I settled for a cheap cream lace number. It didn’t quite fit the style (it had too much shape to it really) but I figured I could make it more 1920’s with some accessories and make-up. I knew I had some shoes somewhere that we’re very 1920’s, but unfortunately I seem to have left them in the north so I settled with some matching lace heels.

I ended up tying a ribbon round my waist, not all that 1920’s but it looked pretty and gave me a big bow on the back (I love big bows!). I also wore a few long, beaded necklaces to try and make up for the lack of tassels. For the headpiece I used an old sparkly headband I wore when I danced the charleston with my old dance school (how appropriate!) and attached a big flower to it as I didn’t have any feathers.

For my make-up I made it quite simple just adding some eyeliner and then bright red lipstick. I wasn’t about to cut all my hair off into a 1920’s bob, so I just left it as it was, straight and long.

Considering my lack of time and money I think I actually looked pretty good!
It turned out to be a really good night. Just him and I dancing like idiots whilst getting a little merry.

It’s a shame the journey back wasn’t quite so fun. Our flat is really hard to get to with the night buses. This meant we had to take 2 buses and then walk for 40 minutes, which wouldn’t be too bad if it wasn’t freezing and absolutely pouring it down with rain.
Hopefully there’ll be many more good nights out soon, if I’m not working too much that is.
‘Till next time!!